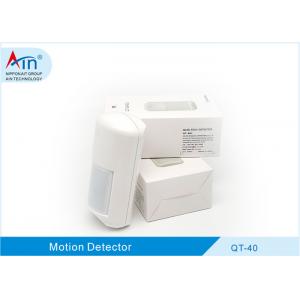
QT-40; Wide Angle Pir Microwave and Motion Detector 10 To 16 VDC For Indoor Security
Brand Name:ALEPH
Certification:CE ISO
Model Number:QT-40
Minimum Order Quantity:1pcs
Delivery Time:25-30 days
Payment Terms:TT IN ADVANCE
Contact Now
Add to Cart
Active Member
Location:
Shenzhen Guangdong China
Address:
No. 301A, 3F, C6 Bldg, Hengfeng,No 739 Zhoushi Rd,Hezhou, Hangcheng, Bao'an, Shenzhen City, 518000 China
Supplier`s last login times:
within 11 hours
Shipping
lt's easy to get a shipping quote! Just click the button below and complete the short form.
Get Shipping Quote
Product Details
Company Profile
Product Details
QT-40 Quad Element Outdoor Indoor Microwave PIR Detector With Pet Immunity For Intrusion Alarm
Description
| Microwave Freq. | 10.525 GHz, pulsed |
| Input Voltage | 10 to 16 VDC, 12 VDC nominal |
| Input Current | 15 mA max. (SL model 30 mA), 11 mA quiescent (approx.) |
| Pyro Type | Dual Element |
| Pulse Count | Jumper selectable: PC2, PC4 |
| Warm-up Time | < 50 seconds |
| Alarm Period | 2.4 seconds, retriggerable |
| Visual Indicator | Red Alarm LED (Selectable On / Off) |
| Alarm Output | NC, solid state, 19 VDC, 100 mA, 13 ohms resistance typ. |
| Tamper Output | NC, dry contact, 30 VDC, 500 mA, 5 W max. |
| Mounting Height | 7 to 8.5 ft (2.1 to 2.6 m) |
| Operating Temp. | 14° to 131° F (-10° to+55° C) |
| Environmental | 95% humidity non-condensing |
| Weight | 3.7 oz / 105 g |
| Dimensions | 4.8” H x 2.5” W x 1.7” D / 12.2cm x 6.4cm x 4.3cm |
Available with 40-foot and 60-foot protection patterns, QT Series intrusion detectors provide high quality PIR+microwave security at an outstanding value. Aleph’s unique “QT” signal processing evaluates PIR and microwave information while factoring in ambient temperature and light for superior “Quad-Tech” performance. The Security Light feature adds safety lighting, providing a soft white light when triggered in a darkened room.
Installation
Select an installation height between 7 ft. (2.1 m) and 8.5 ft.
(2.6 m). Optimum mounting height is 7.5 ft. (2.3 m). Avoid aiming
the intrusion detector towards windows, areas exposed to direct
sunlight, and heating/cooling outlets. For best performance,
position the detector so its field of view is unobstructed, and the
anticipated path of an intruder will cross the PIR beam pattern.
Separate the front and rear covers by first backing out the cover
latch screw three to four full turns. Using a small screwdriver or
similar tool, release the cover latch. To remove the PCB, push the
PCB latch away from the board while grasping a terminal block and
pulling the PCB out of the cover. Do not pull on the microwave
module. Refer to Figures 1 and 2, below.
Wire the detector to the control panel using 18 to 22 AWG
conductor, standard non-shielded cable. Avoid running alarm wiring
parallel to AC wiring. Wiring knockouts and wire channel are
provided in the rear cover for unobtrusive wiring. Terminal block
configuration is shown in Fig. 3, below.
Adjustments & Settings
Prior to mounting the detector, configure jumper settings as
required (see Fig. 2, below).
Pulse Count: When Pulse Count jumper is covering both pins, PC is set at 2:
two to three normal steps are required to trigger an alarm. Parking
the PC jumper on one pin (or removing jumper) sets PC to 4: four to
five steps will trigger an alarm.
50 / 60 Hz: Set to AC mains frequency for fluorescent light immunity. Jumper
installed on both pins programs the detector for 60 Hz immunity.
Parking the jumper on one pin (or removing jumper) programs the
detector for 50 Hz immunity.
LED Enable: When Jumper is covering both pins, the Alarm LED is enabled. The
Alarm LED glows through the lookdown lens when an alarm is
signaled at the Alarm Output terminals. LED brightness
automatically increases when light level in detection area is high.
As room light dims so does the LED brightness. Parking the jumper
on one pin (or removing jumper) disables the Alarm LED but has no
effect on the alarm output.
Microwave Sensitivity: Microwave Sensitivity Adjustment is set to the fully clockwise position at the factory for maximum sensitivity (range). The installation in a small room, it may be desirable to reduce microwave sensitivity. Turn the Microwave Sensitivity Adjustment (Fig. 2) counter-clockwise to reduce sensitivity. Setting the adjustment to minimum (fully counter-clockwise) reduces sensitivity to approximately one-third of its maximum value.
SL Front / SL Down: -- Included on Model QT-40SL -- These jumpers independently enable
and disable Security Light “Front” and “Down”
functions. SL Front controls a single white LED which shines
through the main lens. SL Down controls two white LEDs aimed
downward through the lookdown lens. When enabled, Security Light
will turn on when motion is detected and room light is dim.
Continued motion will cause Security Light to remain on. Light will
turn off approximately 10 seconds after motion ceases. NOTE: The
red Alarm LED is suppressed while SL is operating.
Compliance Information:
- All wiring should be in accordance with NEC, NFPA 70.
- Product should be inspected and tested annually.
- The included 100lb. Animal Immune lens and Security Light feature have not been investigated by Underwriters Laboratories Inc.
- Indoor use.
- The unit is intended to be connected to a compatible Listed power supply that provides a minimum of 4 hours standby time.
- 50/60 Hz jumper should be set to 60Hz (jumper installed) for N. American installations.
- Maximum microwave sensitivity and Pulse Count 2 are to be used for UL applications.
Protection Patterns
Troubleshooting
| Trouble | Likely Causes | Remedy |
| Unit does not power up. | No or low input power. Input power polarity reversed. | Apply proper input voltage. Correct wiring polarity. |
| Alarm LED does not light. | LED jumper is set to “LED OFF”. Incorrect sensor mounting height or aiming. Pulse count setting incorrect for protection area . | Set LED jumper to“LED ENABLED”. Alter the mounting height or aim. Set pulse count jumper to suit the detection requirements. |
| Alarm LED / Relaytriggers without movement in the protection area. | Animals / rodents in protection area. Heating or air conditioning
outlets in sensor view. If using the optional animal immune lens: Pet access to furniture or room fixture in view of the detector. | Block access of animals / rodents. Re-aim sensor. Ensure that pets can not climb up onto furniture / fixtures in protection area. |
| An alarm is indicated at the LED but not at the alarm output. | Incorrect wiring at the alarm output terminals. Lightning damage. | Correct the wiring fault. Replace sensor. |
| Alarm LED on constantly, no fault in protected area or wiring . | Defective unit. | Replace sensor. |
| Unit continues to operate after input power has been disconnected. | The wire to the power input was disconnected, the “+” is still connected. The power is finding a return path through the Alarm Output protection device and alarm wiring. | Disconnect wire from the “+” power input. |
Maintenance
- INSPECTION: An inspection of this unit should be made periodically, including, but not limited to all mounting, wiring, and the condition of the interior area and components.
- CLEANING: Clean the external plastic parts of this unit with a soft, clean, cloth dampened with water.
- TESTING: This unit should be tested routinely for proper operation. At a minimum, operation should be fully checked yearly.

QT-40; Wide Angle Pir Microwave and Motion Detector 10 To 16 VDC For Indoor Security
Inquiry Cart
0