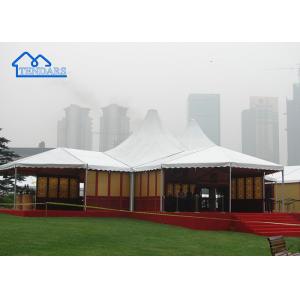

Add to Cart
RU-PF121 Span width | Bay Distance 5m | Bay Distance 10m | Bay Distance 15m | Bay Distance 20m |
8m | ≈18 people | ≈36 people | ≈54 people | ≈72 people |
10m | ≈22 people | ≈44 people | ≈66 people | ≈88 people |
12m | ≈26 people | ≈52people | ≈78 people | ≈104 people |
15m | ≈32 people | ≈64 people | ≈96 people | ≈128 people |
Installation: Before installation, the customer needs to prepare
tools: two step ladders, two adjustable wrenches, two twine <30
M >, 50 m tape measure.)
Step 1: Locate the column bottom plate
First determine the ground level of the installation site, and then
locate the bottom plate, from the center of the bottom plate to the
center of the bottom plate distance
The direction is 15 meters, the transverse is 5 meters, because
this tutorial is based on a 15 meter span of the tent as an
example, so the longitudinal distance is 15 meters,
The lateral, that is, the length direction of the tent, can be
extended indefinitely in multiples of 5 meters. The attention must
be center to center
The distance. After determining the position of the four
baseboards, then measure whether the diagonal distances are equal.
Not equal must be
Reposition, make sure it's a rectangle and not a parallelogram.
After fixing the position, fix the column bottom plate in the
corresponding position
Four positions of the tent (see Section 3 of this article: Tent
fixing measures). The same method applies to length square
The other bottom plates are positioned and fixed.
Step 2: Lay out the parts
The column, Angle joints, inclined beam segment A, inclined beam
segment B (beam span more than 14 meters need to use two diagonal
Beam), inclined beam connector (for connecting inclined beam
segment A and inclined beam segment B, no such part for spans below
14 meters), top section
Click the image below to place, all the components form a gable,
which is called the span of the herringbone frame. Set the rest
The gable parts are placed according to the same principle, and it
must be placed flat on the ground in one direction.
Step 3: Connect the inclined beam A/B segment
Insert the diagonal beam A section into the diagonal beam B section
of the diagonal beam acceptor (we always group the diagonal beam
acceptor when packing
Install it on section B of the inclined beam, fasten the two screws
(note: the small hole is not installed with screws), and tighten
the nut.
Install other inclined beams A and B in the same way (skip this
process if the span is less than 14 meters)
Step 4: Install the top node
Connect section AB of the connected inclined beam to the top node,
fasten the screws, and tighten them. If it's in first gear
If it is necessary to install the wire cable, the buckle of the end
of the wire cable is installed on the second hole of the B section
of the inclined beam.
As shown in the following figure: fasten the screw, tighten the nut
slightly, and make sure that the buckle seat can turn by itself (if
it is not installed in the middle)
Wire cable gable, this hole does not need to be loaded with
screws). Note: To insert the screw, pay attention to the screw rod
generally
It is toward the inside of the tent, and the screws of the first
gable and the second gable are opposite to each other, especially
the wire cable
The installation direction must be relative, only when the gable is
erected can the wire cable be pulled. In this way
Install all top joints and diagonal beam AB.
Step 5: Install the corner node
Insert the diagonal end of the Angle node into section A of the
diagonal beam, and connect the upper end of the column to the
straight end of the Angle node at the same time
Screw and screw on the nut. Note: If installing wire cable and
cross bar, Angle node oblique end above that hole
Install screws, the hole below the straight end of the corner node
install screws. Install the other corner nodes in the same way.
Step 6: Connect the column to the bottom plate
Align the lower plug-in holes on the column with the screws
connecting the holes on the base plate, and tighten the nuts. Same
approach
Connect the other column bottom plate to the column. Note that the
entire installation process must be handled lightly, and there must
be
Use wood to put the assembled gables cushion, moving the aluminum
must lift the entire frame, avoid aluminum and the ground
The friction of sand and other objects on the aluminum surface
causes scratching. In addition, the column and bottom plate can be
installed before installation
Uprights and corner joints, the effect is the same. After
assembling all the gables, swing them next to the bottom plate on
either side of the first gable
Put the ladder (miter ladder) to erect the gable back to install
the cross rod, prepare the screws and wrenches and personnel, and
Lift the cross bar to the side of the column for use. It is best to
install a canopy with a span of 15 meters with more than 12
personnel
Install and prepare all the work after entering the gable steps.
We are manufacturer, so we can give you competitive prices.
2. What about your MOQ - minimum order quantity ?
1 SET
3. Can you customized?
Yes, please offer your drawing with technical requirements.
4.Do you Accept OEM service?
YES!
5.What's your Delivery Time?
15-30 days, please confirm with us before order!
6.How you pack products?
Aluminum frame packed in air bubble film, roof and sidewall in professional PVC carry bag.
