Add to Cart
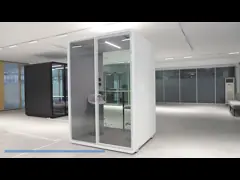
How to Install a Ceiling-Mounted Movable Partition Wall
Installing a ceiling-mounted movable partition requires precise
alignment, proper structural support, and careful assembly to
ensure smooth operation. Below is a step-by-step guide for
professional installation.
| 1. Pre-Installation Preparation | ✔ Structural Assessment | Confirm the ceiling can support the partition’s weight (consult an engineer if needed). | |
| Check for obstructions (ducts, beams, lighting) that may interfere with the track. | |||
| Ensure the floor is level (critical for proper alignment). | |||
| ✔ Tools & Materials Needed | Tools | Materials | |
| Laser level | Ceiling track system | ||
| Drill & anchors | Partition panels | ||
| Measuring tape | Trolleys/carriers | ||
| Lifting equipment | Acoustic seals | ||
| Screwdrivers & wrenches | Motorized drive (if automated) | ||
2. Step-by-Step Installation Process
| Step 1: Mark the Track Position | Use a laser level to mark a straight guideline where the track will be installed. |
| Measure panel widths to ensure proper alignment. | |
| Step 2: Install the Ceiling Track | For concrete ceilings: Use heavy-duty anchors (wedge or sleeve anchors). |
| For steel structures: Bolt directly into steel beams or use unistrut channels. | |
| For suspended ceilings: Reinforce with backing bars or a secondary support frame. | |
| Step 3: Mount the Trolleys/Carriers | Attach rolling trolleys to the track at designated intervals (usually every 1-1.5m). |
| Ensure they move smoothly before attaching panels. | |
| Step 4: Lift & Hang the Partition Panels | Use a panel lift or suction handles to safely position panels. |
| Secure panels to the trolleys using hanger brackets. | |
| Check for plumb alignment (panels should hang straight without tilting). | |
| Step 5: Install Bottom Guides (If Needed) | Some systems use floor guides (not full tracks) to prevent swaying. |
| Ensure guides allow smooth movement without friction. | |
| Step 6: Add Seals & Finishing | Install acoustic seals (top, sides, and bottom) for soundproofing. |
| Cover track edges with trim pieces for a clean look. | |
| Step 7: Test & Adjust | Manually slide panels to check for smooth movement. |
| Adjust trolley tension if panels drag or wobble. | |
| For motorized systems, test remote controls & sensors. |
3. Key Considerations for Ceiling-Mounted Systems
✔ Weight Support Requirements
| Partition Type | Approx. Weight per m² |
| Glass partitions | 25-40 kg |
| Solid acoustic panels | 30-50 kg |
| Double-glazed glass | 50-80 kg |
➔ Ceiling must handle 2-3x the partition’s total weight for safety.
✔ Movement Systems Comparison
| Type | Best For | Pro | Cons |
| Manual push-slide | Light partitions, small spaces | Low cost, simple | Harder to move heavy panels |
| Motorized | Heavy/extra-high walls | Smooth, automated | Higher cost, needs power |
| Magnetic levitation | Ultra-smooth movement | Silent, minimal friction | Expensive, rare |
✔ Common Mistakes to Avoid
Uneven track installation → Causes jamming
Insufficient ceiling support → Risk of collapse
Poor panel alignment → Gaps in soundproofing
Skipping test runs → Operational failures
4. Maintenance Tips
Lubricate tracks annually with silicone spray.
Check hanger bolts for loosening over time.
Clean seals to maintain acoustic performance.
Conclusion
Ceiling-mounted movable partitions offer a clean, floor-track-free
solution for modern spaces. Proper installation ensures smooth
operation, durability, and sound control.
Need recommendations for track systems or motorized drives? Let me know your project specs!