
Add to Cart
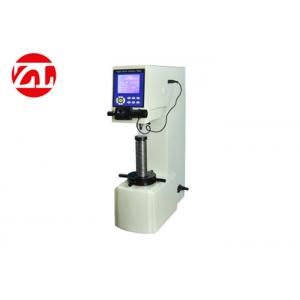
HBS-3000 Digital Brinell hardness tester is newly developed and is a new generation of Brinell hardness tester with domestic advanced level. It is suitable for Brinell hardness determination of ferrous and non-ferrous metals. This machine adopts electronic automatic loading, computer software programming, high magnification optical measurement, photoelectric sensing and other systems. The data of various operation processes and test results can be displayed on the large screen of the LTD, and the data of the test results can be output through the printer. This machine is suitable for all kinds of production and processing enterprises, colleges and universities, laboratories of scientific research machinery.
Technical parameters:
| Brinell Scale | HBW2.5/62.5,HBW2.5/187.5,HBW5/125,HBW5/750, HBW10/100, HBW10/250, HBW10/500,HBW10/1000,HBW10/1500,HBW10/3000 |
| Testing Force | 62.5kgf(612.9N),100kgf (980.7N),125kgf (1226N),187.5kgf (1839N),250kgf 250kgf (2452N),500kgf (4903N),750kgf (7355N),1000kgf (8907N),1500kgf 1500kgf (14710N),3000kgf (29420N) |
| Min Measuring Unit | 0.625μm |
| Duration time | 5~60S |
| Overall Dimension | 550×210×750mm(L*W*H) |
| Net Weight | 125kg |
| Max Height of Specimen | 180mm |
| Power supply | AC220V±5%,50~60Hz |
| Carried Standard | GB/T231.2, JJG150 |
| Standard Accessories | A set of Measuring Microscope, Diameter: 2.5, 5 and 10mm Hard Alloy Ball Indenters, 2 pcs Standard Hardness Blocks, Large Testing Table, Medium Testing Table, “V”- shaped Testing Table, Power Cable |
| Brinell Scale | HBW2.5/62.5,HBW2.5/187.5,HBW5/125,HBW5/750, HBW10/100, HBW10/250, HBW10/500,HBW10/1000,HBW10/1500,HBW10/3000 |
| Testing Force | 62.5kgf(612.9N),100kgf (980.7N),125kgf (1226N),187.5kgf (1839N),250kgf 250kgf (2452N),500kgf (4903N),750kgf (7355N),1000kgf (8907N),1500kgf 1500kgf (14710N),3000kgf (29420N) |
4. How do you read a Brinell microscope?
Manual reading is easy and straightforward. You look through the
lenses, focus the optics, position in the lens on the impression
and read the result in mm. The result in mm is then converted to
HBW (Hardness Brinell) by looking up the mm measurement and the
table provides the hardness.
5. What is the difference between Brinell and Rockwell hardness
test?
The Brinell hardness testing uses a 10mm hardened steel ball, while
the Rockwell test uses either a much smaller steel ball (<4mm)
or a diamond cone, depending on the material being tested. The
Rockwell test measure the depth of the indentation, while the
Brinell test measures the width of the indentation.
6. What indenter is used for Brinell test?
spherical indenter
In the Brinell hardness test, an optical method, the size of
indentation left by the indenter is measured. In contrast to the
likewise optical Vickers method,which involves a pyramid-shaped
indenter being pressed into a specimen, the Brinell method uses a
spherical indenter.
7. How do you find the Brinell hardness number?
The Brinell hardness number (BHN) is calculated by dividing the
load applied by the surface area of the indentation. Figs.
6.72–6.74 show some of the Brinell hardness test sites.
8. Is standard for Brinell hardness testing?
ISO 6506-1:2014 specifies the method for the Brinell hardness test
for metallic materials. It is applicable to both fixed location and
portable hardness testing machines.
9. What is a Brinell microscope?
This instrument is a low-power hand-held microscope for measuring
the diameter of a Brinell hardness indentation. The Brinell
hardness value is calculated from the indentation diameter
measurement, ball diameter and applied force. The Brinell hardness
test was developed around 1900 for testing the hardness of metals.
Machine Certificate:
Business license Fame Certificates Wall
Sales Team and Technicial Team:
Exhibition:
