
Add to Cart
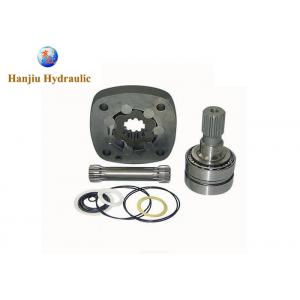
Hydraulic Motor Replacement Part, Char Lynn 2000 Series disc valve geroler motor repair Reassembly manual
Reassembly
Check all mating surfaces. Replace any parts that have
scratches or burrs that could cause leakage. Clean all metal
parts in clean solvent. Blow dry with air. Do not wipe dry
with cloth or paper towel because lint or other matter can
get in the hydraulic system and cause damage. Do not use
a coarse grit or try to file or grind these parts. Check around
the keyway and chamfered area of the shaft for burrs, nicks
or sharp edges that can damage the seals when reassembling the
bearing housing.
NNote: Lubricate all seals (prior to installation) with petroleum
jelly such as Vaseline. Use new seals when
reassembling this motor. Refer to parts list (6-129) for
proper seal kit number.
21. Use a press to install exclusion seal in outer bore of
bearing housing. Lip of seal must face outward. See
Figure 11. If a press is not available use a plastic or
rubber hammer, being careful not to damage or cock
seal in the bore.
22. Place back-up washer into seal bore. Place shaft seal
onto installation tool (600496) and press seal into
seal bore of the housing.
23.Clamp housing in vise, see Figure 1.
24. Place protective bullet (see note below) over shaft.
Apply petroleum jelly to inside diameter of dust and
shaft seal. You may need a press to install shaft and
bearing assembly. Do not distort shaft seal. Damage
to this seal will cause leakage.
NNote: Note: Bullet (600465), for 1inch dia. shafts,
available — by special order. Use tape over other
shafts to prevent cutting the seals.
25. Apply petroleum jelly to the 76,0 [3.00] diameter seal.
Install seal into the bearing housing.
26. Alignment studs can be very helpful in reassembly
of the motor. See special tool listing page 2. If you
use studs, install 2 studs diagonally opposed in the bearing
housing.
27. Install the shaft face seal in the wear plate as shown
in Figure 11. Do not distort seal.
28. Install the wear plate, see Figure 11.
29. Apply a light film of petroleum jelly to the 76,0 [3.00]
diameter seal and install seal in the wear plate.
30. Install the drive into the output shaft.
31. Align the notch on the outside of the Geroler with the
notch on the wear plate. Install the Geroler against
the wear plate. Be sure to retain the rollers in the
outer ring if they are loose.
32. Install the valve drive in the Geroler.
NNote: Installation at this time involves 3 steps in the timing
of the motor. Timing determines the direction of rotation of the
output shaft.
Timing parts include:
1. Geroler
2. Valve Drive
3. Valve Plate
4. Valve
Timing Step # 1 — Locate the largest open pocket in the
Geroler and mark it on the outside edge of the Geroler.
33. Apply a light film of petroleum jelly to the 76,0 [3.00]
diameter seal. Install seal in groove of valve plate.
34. Align the notch on the outside of the valve plate with
the notch on the Geroler as shown in Figure 12.
Timing Step # 2 — Locate the slot opening in the valve
plate which is in line with the largest open pocket of
the Geroler.
Timing Step # 3 — Locate any one of the side openings of
the valve and align this opening with the open slot of the
valve plate that is in line with the largest open pocket of the
Geroler. Install the valve by rotating it clockwise until the
spine teeth engage (1/2 spine tooth max.). This will provide
the proper rotation when pressurized as shown in Figure 13.
35. Install 2 springs and 2 pins in the holes located in the
bore of the valve housing, as shown in Figure 14.
36. Apply a light film of petroleum jelly to the 76,0 [3.00]
diameter seal. Install seal in the valve housing.
37. Apply petroleum jelly to inner and outer face seals.
Install seals on balance ring as shown in Figure 15.
Important: Install face seals in the positions shown in
Figure 15, or the motor will not operate properly. Do not
force or bend the face seals. Any damage to these seals will
affect the operation of the motor.
38. Align pin notches in balance ring with pins in bore of
valve housing. Install balance ring assembly in valve
housing.
39. Insert your finger through port of valve housing.
Apply pressure to side of balance ring as shown in
Figure 16. Hold ring in position until valve housing is
in place against valve plate (see Figure 17).
NNote: After installing the valve housing on the valve plate
check for proper placement. Push down on the valve
housing. You should get a slight spring action.get a
slight spring action.


