
Add to Cart
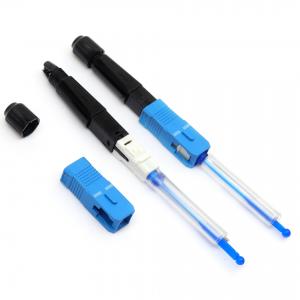
SC fusion splice-on connector is optical fiber type fast connector, but its splicing point inside the connector end, equivalently eliminate the pigtails when splicing. The advantage is no need additional protection after splice, such as splice tray, splice closure, or distribution boxes. In contract to the design of mechanical splicer, it save V-groove mechanical connector maintenance and operation cost and durable, which overturns the concept that high cost of splice machine and do not apply to FTTH construction.
SC Fsion Splice On Connector Features
SC Fsion Splice On Connector Specification
| Model | YDFOSC001 |
| Connector type | SC/UPC, SC/APC |
| Cable type | 0.9mm, 2.0mm, 3.0mm, 3.1*2.0mm drop cable |
| Fiber diameter | 125um(G657A2 bare fiber) |
| Tight buffer diameter | 250um |
| Fiber type | Single mode OS1 9/125um |
| Insertion loss | ≤0.3dB |
| Return loss | ≤-50dB |
| Bare fiber solid tightness | >250g |
| Working temperature | -40℃-+80℃ |
| Tension strength | 60N (5kgs for 2mins) |
| Drop test | 4 meters high cement floor direction at a time,in total 3times |
Fusion Splice-on Connector Instruction Steps
1. Preparation
2. Put heat-shrink tube housing and nut through into the fiber cable
3. Use flat-fiber stripper to strip the covering about 45mm
4. Use the fiber stripper to strip the fiber coating layer ad clean the fiber ,then place the optial fiber to the holder.
5. Cut the fiber by fiber cleaver
6. Place the assembled holder into the fusion splice machine
7. Strip the 0.9mm fiber coating layer
8. Clean the optical fiber and put it into the holder of fusion splicer machine
9. Cut the fiber by fiber cleaver
10. Put the holder into the fusion splicer machine
11. After the two holder tools ready, close the fusion machine,start fusion
12. After fusing,open the machine and take out the whole spliced-connector carefully
13. Insert the heat-shrink tube to the tail of the spliced-connector carefully, then put the whole spliced connector into the fusion machine and start heating up
14. Remove the connector from fusion machine after about 90s heating, and then cooling down for about 5s
to 10s.
15. Complete assembly
* Please use the customized FTTH melting machine
* Recommended consumable:
Keep a supply of the following items
