Add to Cart
HUATEC Sand Mould Surface Hardness Tester HT-6710A/B/C
1. Model guide
2. FEATURES
* It meets standards of DIN 53505, ISO 868, ISO 7619, ASTMD 2240,
JISK7215.
* The Sand Mould Surface Hardness Tester is used to measure the
surface hardness of the sand mould/core of the wet mold and provide
technical parameters for the formulation of the molding process.
* The surface hardness of sand mold is divided into three types: A,
B and C, The common model is type B, among them:
Type A: Suitable for the surface hardness test of fine sand
mold/core in manual or mechanical low and medium pressure molding.
Type B: Suitable for the surface hardness test of fine and coarse
sand mold/core in manual or mechanical low and medium pressure
molding.
Type C: Suitable for the surface hardness test of sand mold in high
pressure molding.
* The unit of type B hardness tester for sand mold surface is
(g/mm2), but it is customary to use hardness H (A/B/C) instead of
unit. Because their values are related and consistent, the
corresponding hardness value is also large when the unit value is
large (g/mm2).
* With average calculate function.
* Peak value deposit function.
* Under-voltage alarm function.
* Use USB data output to connect with PC.
* Provide Bluetooth data output choice.
* The HUATEC Sand Mould Surface Hardness Tester is used to measure the surface hardness of the sand mould/core of the wet mold and provide technical parameters for the formulation of the molding process.
* The unit of type B hardness tester for sand 2 mold surface is (g/mm ), but it is customary to use hardness H(A/B/C) instead of unit. Be c a u s e t h e ir v a l u e s a r e r e l a t e d a n d consistent, the corresponding hardness value is 2 also large when the unit value is large (g/mm ).
* Low voltage indicator.
* Digital display gives exact reading with no guessing or errors.
* Automatic power off to conserve power.
* Internal parameters: It has the function of peak value latch, average value calculation and under voltage alarm.
* Power supply: 2x1.5v AA (UM-3) battery
* Operating condition: Temp. 0~40˚C Humidity <80%
* Size: 162x65x28mm (6.4x2.6x1.1inch)
* Weight: about 170g (not including batteries)
* Power off: 2 modes Manual off at any time by depressing the power key till OFF shows on the display or Auto power off after 2 minutes from last key operation.
3. WORKING PRINCIPLE
According to the principle that the force on the spring is linear with the stroke, the stroke is converted into a value through the sensor. The unit of surface hardness of molding sand B 2 is (g/mm ), but it is customary to indicate it in terms of hardness H(A/B/C) instead of unit. Because their quantities are related and consistent, the corresponding degree value is 2 also large when the unit value is large (g/mm ).
4. SPECIFICATIONS
Display: 4 digits, 10 mm LCD Display
Range: 0~100 H(A/B/C)
Measurement Range: 10~90 H(A/B/C)
Resolution: 0.1 H(A/B/C)
Measurement deviation: ≤ ±1H(A/B/C)
| Model | HT-6710A | HT-6710B | HT-6710C |
| Stroke | 2.50mm | 2.50mm | 2.50mm |
| Load | 237g | 980g | 1500g |
| Pressure Load | 90g | 50g | 180g |
| Shape and size of indenter | Spherical R2.50 | Spherical R12.70 | Spherical R1.20 |
| Unit | HA | HB | HC |
| Display | 4 digits, 10mm LCD | ||
| Parameters | Tested Result / Mean Value / Max. Value | ||
| Display Range | 0~100H(A/B/C) | ||
| Testing Range | 10~90H(A/B/C) | ||
| Accuracy | ≤±1H(A/B/C) | ||
| Resolution | 0.1H(A/B/C) | ||
| Battery Indicator | Low Battery Indicator | ||
| Auto Switch Off | √ | ||
| Operating | Temperature: 0~40°C Humidity: <80%RH | ||
| Power Supply | 2x1.5V AAA (UM-4) Battery | ||
| Dimensions | 162x65x28mm | ||
| Weight | 170g | ||
| Standard Accessories | Main Unit | ||
| Carrying Case | |||
| Operation Manual, Calibration Certificate | |||
| Optional Accessories | USB Data Cable with Software | ||
| Bluetooth Data Adapter with Software | |||
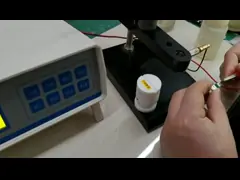
5. MEASURING PROCEDURE
5.1 Test specimen the minimum thickness is specified in a different standard, see part 1. Specimen should allow measurement to be taken at least 12 mm from any edge. Specimen surface should be flat and parallel to allow the presser face to contact to the specimen over an area which has a minimum radius of 6mm from the durometer probe. The specimen may be constructed with layered pieces to a c h i e v e t h e n e c e s s a r y t h i c k n e s s requirements, however measurements taken on these specimens may not agree with those made on solid specimens, due to the surface faces between layers not being in complete contact.
5.2 Depress and release the “Power key” to power the tester on.
5.3 Depress the “MAX” key till the mark MAX shows on the display.
5.4 Hold the durometer vertically with the point of the indenter at least 12 mm from any edge. Apply the presser foot to the specimen as rapidly as possible, without shock, keeping the foot parallel to the surface of the specimen. Apply just sufficient force to obtain firm contact between the presser foot and the specimen. Hold for 1 or 2 seconds, the maximum reading can be obtained automatically.
5.5 To take the next measurement, just depress the “Zero key” and repeat 6.4. On the other hand, you can depress the “Max hold key” till the mark MAX disappears from the display. And then repeat the step 6.3 and 6.4.
5.6 If other than a maximum reading is needed, no need to set the mark “MAX” showing on the display. In such case, the reading on the display is an instant value. Just hold the durometer in place without motion and obtain the reading after the required time interval (Normally less than 1 second) .
5.7 How to take average value
5.7.1 To take the average value of many times of measurements, just depress and release the “N/AVE key” to make the symbol “N” showing on the display, followed by a digit between 1-9 with the prefix “No.” . Here the digit is the times of measurements used to calculate the average value. Every time depress and release the “N/AVE key”, the digit will increase 1. And the digit will become “1” while depressing the “N/AVE key” at “9” .
5.7.2 Adjust the digit to the number needed and depress “MAX key” or “Zero key” to return to the measurement state or wait for several seconds till “0” on the display.
5.7.3 Take measurements as per steps from 5.3 to 5.5. Be sure that every test should be 6 mm apart. Every time take a measurement, the reading and the times of measurements show on the display. When the times of measurements is equal to the number set, the unit first displays the reading of the last , and then display the average value of last “N” measurements, followed by 2 beeps, with a symbol “AVE” indicating on the display. 5.7.4 To take the next average value, just repeat 5.7.3. 5.7.5 To release from average measurement, just depress the “N/AVE” till “N” disappears.
6. CALIBRATION CHECK
To check whether the tester is accurate, just Insert the indenter into the hole of the calibrated test Block. Apply enough force to make firm contact between the top surface of the test block and the presser foot. The reading should agree with the value stamped on the test block. If not, just carry out Zero calibration and High end calibration.
6.1 Zero calibration Hold the durometer vertically with the point of the indenter hanging in the air, the reading on the display should be “0”. If not, depress the “Zero key” to make the tester display “0”.
6.2 High end calibration Just place the indenter onto a flat glass, apply enough force to make firm contact between the glass and the presser foot. The readings on the display should lie between 99.5 and 101. If not, press “CAL key” to carry out high end calibration.
7. BATTERY REPLACEMENT
7.1 When the battery symbol appears on the display, it is time to replace the batteries.
7.2 Slide the Battery Cover away from the tester and remove the batteries.
7.3 Install batteries paying careful attention to polarity.
8. ACCESSORIES
Standard Accessories: Carrying case .............1 pc. Operation manual .........1 pc. Calibration certificate…… 1 pc.
Optional accessory: Cable and software for RS232C